6 beginner tips to know before you start editing photos

When the world of post-production becomes overwhelming, image-editing extraordinaire Kristof Göttling has your back
YouTuber, photographer and image-editing coach Kristof Göttling runs a weekly editing series and has more than 400 tutorials on his YouTube channel. Here the photographer, who shoots a wide variety of genres, from landscape to weddings, shares his six top editing tips.
1. If you’re starting out, shoot in JPEG
Every time you capture an image on the camera’s sensor, you record digital data. A JPEG file compresses that data and some basic editing is automatically done in the camera. A RAW file, on the other hand, stores all the data on the image from the camera’s sensor, and more data means a greater ability to edit and tweak your images.
“If you don’t know how to edit in Adobe Photoshop, shoot JPEG because the camera knows how to develop the image better than you,” Kristof explains. “First, learn Adobe Lightroom or Photoshop and how image processing works, otherwise it’s no fun playing with RAW files. Plus, if you want to quickly share with friends and family, you have to convert RAW files first.”
Read more: Why photograph in RAW?
2. You won’t learn to edit overnight
Learning to edit is a timely process. Set targets for yourself to take an image every day or week and get better by doing this. “I always recommend photographing at least five pictures a week. I take and edit photos daily to get even better,” Kristof says. He also recommends learning to edit in Adobe Lightroom before Photoshop, as Lightroom slightly more resembles mobile phone editing and can be less daunting.
3. Presets can be useful, but don’t rely on them
Presets are a group of photo-editing settings designed to transform your digital images into a finished product at the click of a few buttons. Presets often ensure sharpness in the image and remove chromatic aberration (the purple colour fringing that can cause unwanted colour along the edges of objects). “Presets are useful,” Kristof says. “But every photo is different, especially if you photograph a variety of genres, and so the settings may not be as relevant.”


4. Learn composition first
There are rules to photography. Learn the below first, then have a go at breaking the rules.
- Rule of thirds
- A compositional guideline that breaks down an image into thirds (both horizontally and vertically), so you have nine squares. The breakdown allows for your subject to be placed in the left or right third of an image, allowing a harmonised balance with the negative space and your subject.
- Correctly balance light
- The brightest part of your image is always where the eyes are drawn to first, which is why it needs to be correctly lit. For a beginner’s guide to light click here.
- Remove disturbing background objects
- Make post-processing easy for yourself! If there’s a background object interfering with your photo and you can remove it yourself, don’t delay. Thinking you can edit everything out in post-processing can often make editing stressful and time-consuming.
- Wide aperture isn’t always needed for brilliant bokeh
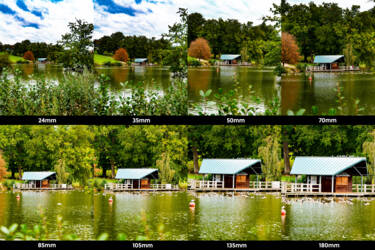
- A wide aperture of f/1.8 or f/2.8 isn’t always a prerequisite for a beautiful, blurred background (known as bokeh). This is especially useful if you have a lens that doesn’t offer as wide of an aperture, such as the NIKKOR Z DX 16-50mm f/3.5-6.3 VR. Have a go with your aperture open at f/4 and remember:
- The longer your focal length, the more depth you can achieve.
- Increasing distance from photographer and subject and subject to background can increase bokeh.
- A wide aperture of f/1.8 or f/2.8 isn’t always a prerequisite for a beautiful, blurred background (known as bokeh). This is especially useful if you have a lens that doesn’t offer as wide of an aperture, such as the NIKKOR Z DX 16-50mm f/3.5-6.3 VR. Have a go with your aperture open at f/4 and remember:
Read more: What is bokeh (and how should I use it?)


5. Understand contrast by switching your EVF to monochrome
Shake things up by switching your camera’s electronic viewfinder (the screen you hold up to your eye to see the image) to monochrome in Photo Shooting Menu. “In black and white, you can understand contrast better, where lighting should go and where the brightest part of the image is,” explains Kristof. “This will help you understand contrast and lighting in Photoshop quicker because you’ll be better equipped to spot the contrast.”
6. You don’t need to invest in expensive software
If you’re taking your first steps in post-processing, you don’t want a hefty price tag. Check out Nikon’s free-to-install NX studio, a new image-processing suite designed for viewing, processing and editing images captured with Nikon digital cameras, compatible with both Mac and Windows. Click here for more details.
Follow Kristof Göttling on Instagram and find out what’s in his kitbag here.
More in technology and know-how
Uncover NIKKOR lenses
What lenses do I need as a portrait photographer? Kitbag essentials for all levels
Unleash your creativity
